Synchronizing google contacts in 78.7 in Linux - Ubuntu 20.04
I have added: Provider for CalDAV & CardDav, and TbSync
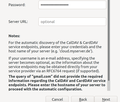
Then I go find synchronnization settings, add CalDAV & CardDav account. Either I choose manual or automatic configuration, entering my gmail address and password gets me nowhere. I am asked for server url at best or CardDav server address.
The response is the same regardless or whether I enter google.com as server URL. What am I missing?
被選擇的解決方法
You have to double-click extensions.dav4tbsync.googlesupport to true in Edit/Preferences/General/Config. editor to see Google in the TbSync settings. Cookies in TB Privacy & Security settings must be allowed for OAuth2 authentication.
從原來的回覆中察看解決方案 👍 1所有回覆 (3)
選擇的解決方法
You have to double-click extensions.dav4tbsync.googlesupport to true in Edit/Preferences/General/Config. editor to see Google in the TbSync settings. Cookies in TB Privacy & Security settings must be allowed for OAuth2 authentication.
Thank you, thank you THANK YOU. That worked like a charm.
I wish the procedure were included in Thunderbird help, because it will not occur to most people to alter the config file. So I propose something along these lines: To allow for synchronization of Google contacts and calendar, follow this procedure:
1) Tools/addons/search:
   "TbSync"
   "Provider for CalDAV & CardDAV"
   Both are installed straight into Thunderbird – no need to download first.
2) Edit/preferences/general
   Scroll to the bottom of that page and find: "Config editor"
   Open (you will get a warning, but "accept the risk") Scroll down till you find:
   "extensions.dav4tbsync.googlesupport"
   Click that line to change from false to true.
3) Edit/Synchronization settings/Account actions/Add new account/CalDAv & CardDav ->
   Find Google down the list, and click it.
   Add account name - Just a name. Call it anything, e.g. Work or Private
   Click "Next", and now you are in Google territory.
And, oh yes, you have to allow cookies in privay settings.
All your calendars, tasks and contacts will be there, definitely better than ever before, but the process should have been explained.

