Can I remove the <br> tag from the top of my email that I am composing
When I am composing an email, there is a space at the top of my page before my html signature.
I don't want it it there and whenever I backspace or delete it, it affects the colour and font of my HTML signature.
I noticed that Thunderbird has somehow inserted a
which is causing this.
This
is not in my html signature, it is automatically added to my signature by Thunderbird.
Can I removes this?
所有回复 (3)
re: my html signature. How did you create this html signature?
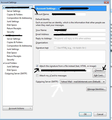
Did you write it in the 'signature text' box? If yes: Please post image showing text.
Or did you compose it in a Write message and save as html file and then attach the signature file? locate the saved html file and open with Notepad. updated:....remove only the 'br' enclosed in chevons.
Save file.
See image:
由Toad-Hall于
Thanks, I have initially tried both options.
I originally composed it in a Write message and saved it as an html file and then attached the signature file.
The odd thing is that when I reopen that file, the is not in there. It only shows up when I compose a new email (and I look at the source code).
So what is happening is that It throws the
in there as soon I want to compose an email, but it does not change my original html file.
I also tried putting my code in the signature box, but had the same results'
由BBY34于
Image attached showing code used for one of my signatures. Second image shows the result I see using the code shown in first image.


